1.1.2 Style Customization Choices (Please contact me or send me pictures if you need special designs):
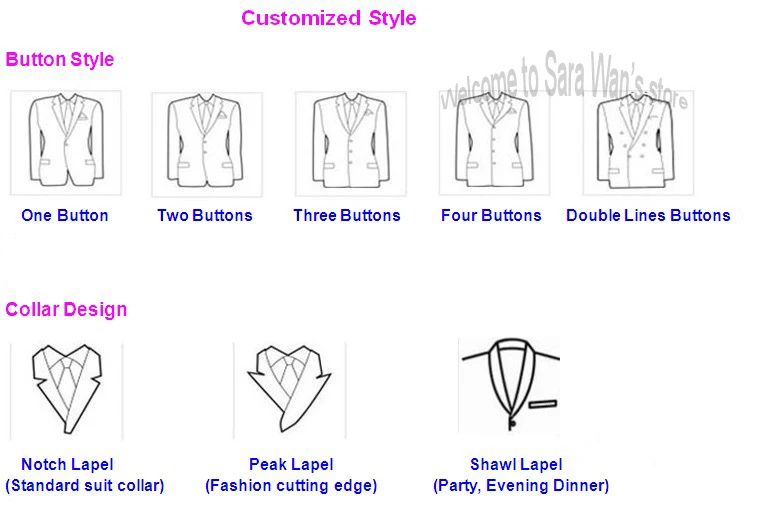

Note:
(1) Customer’s design is welcome. You can give me detailed pictures of the men clothing you like. Then we can make the men suit according to the suit you like. We can custom made all kinds of men suits based on the detailed picture. Free charge to customize according to the above options or other simple adjustment.
(2) Please note that due to limitations in photography and the inevitable difference in monitor/screen settings, the color shown in photograph may not correspond 100% to those in items themselves. There may be a slight color difference between the photograph and the finished men suit
(3) Our tailors will make suits based mainly on your measurements, suits design and experiences, small adjustment will be made accordingly. 1~2 cm variation should be acceptable for customers purchasing this item. This variation doesn’t mean that the suit is defective or mis-shipped.
1.2 Measurement
Step (1.2.1): Preparing for measurement
All the suits in our shop are custom made according to your body size measurements by our senior tailors.
Important tips to have the right measurements:
- Please ask a friend to take measurements according to the measurement instructions below.
- Please provide tight measurements, our tailors will relax measurements to make a well-fitting suit for you according to your height, weight and our tailor’s rich clothing making experiences. You don’t need to relax any measurements. Just provide us all the measurements, all the rest will be done by our tailors perfectly. : )
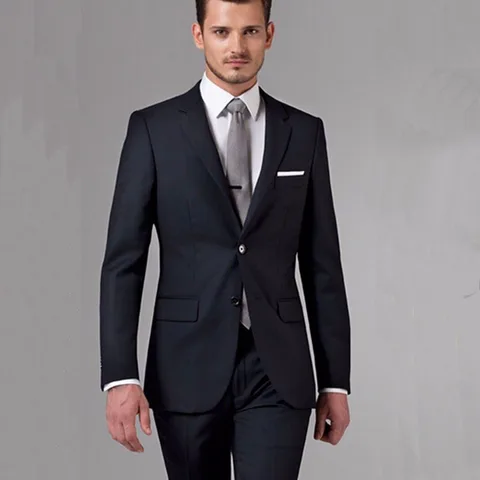
- When you take the measurements, it is better that you wear only a well-fitting shirt and a well-fitting suit pants as our measurement model which is good for right measurements.
- Keep a relaxed and normal natural posture.
- Prepare one measuring tape.
Step (1.2.2): Taking measurements

(1) Neck Circumference: Put the tape around the neck and in the middle of Adam’s apple and sternal notch. Leave a forefinger spacing in the circle as shown in the above picture, read the data on the tape.

(2) Shoulder Width: Put tape along the shoulder arc, measure shoulder arc from the left shoulder point to the right shoulder point. The “shoulder point” is the place where shoulder seam and armhole seam meet on your well-fitting shirt.
(Remark: Shoulder arc is not a straight line. If you have a well-fitting suit jacket with perfect shoulder width, it is better that you wear this jacket, then measure shoulder width according to pictures above. )
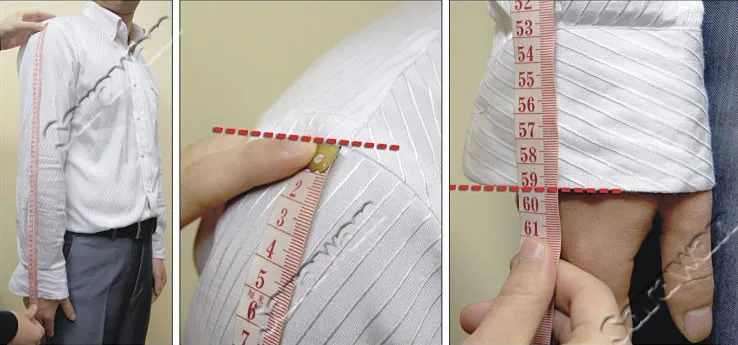
(3) Sleeve Length: Place the tape on the shoulder point (where the shoulder seam and armhole seam meet on your well-fitting shirt). Measure from this shoulder point to the point of hand where thumb and forefinger meet. Keep your arms straight and relaxed.
(Remark: If you have a well-fitting suit jacket with perfect sleeve length, it is better that you wear this jacket, then measure sleeve length according to pictures above.)

(4) Bicep circumference: Put the tape under armpit, measure the circumference of the fullest part of your bicep.

(5) Wrist circumference: Measure the circumference of your wristbone.
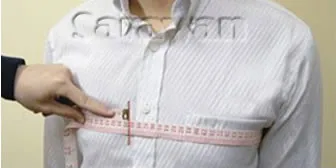

(6) Bust Circumference: Relax your body; maintain a normal breathing standing, natural stance. Under the axilla, measure around the fullest part of your bust, attach your body well, don’t relax measurements, but also not too tight, just your whole bust can feel the measure tape.
(Remark: please only wear one shirt when taking measurements of bust circumference)

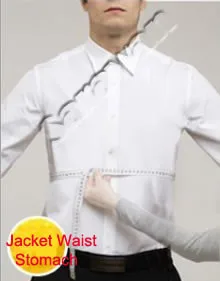
(7) Jacket Waist / Stomach : Relax your body, maintain a normal breathing standing, natural stance. Put the tape in the middle of chest and abdomen (the thinnest part of your upper body, the lower end of the rib), attached the tape to your body well, don’t relax measurements, can be a little tight, but also not be too tight.
(Remark: please only wear one shirt when taking measurements of jacket waist/stomach)
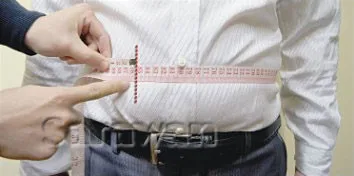
(8) Abdomen Circumference: Relax your body, maintain a normal breathing standing, natural stance. Measure the abdomen circumference in its widest part, usually right across the belly button, attach your body well, don’t relax measurements, but also not too tight, just your whole abdomen can feel the measure tape.
(Remark: please only wear one shirt when taking measurements of abdomen cir )

(9) Jacket Length: Measure straight down from the base of the neck (the point where the shoulder seam and neck seam meet on your well-fitting shirt ), through bust, to thumb finger knuckle (half of the thumb).
(Remark: If you have a well-fitting suit jacket with perfect jacket length, it is better that you wear this jacket, then take measurements of jacket length according to pictures above.)

(10) Waist Circumference: Relax your body, maintain a normal breathing standing, natural stance. Put the tape at the level where you usually wear your pants belt, measure around the thinnest part of your waist, relax and take the measurement.
(Remark: please remove your pants belt when taking measurements of waist circumference; Don’t use Jeans as a reference, since they usually stand lower than suit pants)

(11) Hip Circumference: Put the tape at fullest part of your hips, measure the circumference. Please only wear one pair of pants and don’t put anything in pants pocket.

(12) Trouser Rise: Put the tape through the bottom of crotch, measure from the front top of the pants’ waistband to the back top of the pants waistband. Make sure not to take this measurement too tight.

(13) Thigh Circumference: Put the tape just under the crotch, measure the circumference of the widest part of your thigh.
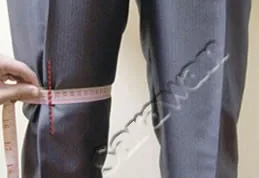
(14) Knee Size : Measure the circumference of your leg at the place 2 ~ 3cm ( one inch ) above your knee.

(15) Trouser Length: Without shoes, measure vertically along the outseam from the top of your pants’ waistband to the floor. (If with shoes, from waistband to the beginning of the heel). Make sure the tape is tight & straight and you stand straightly.
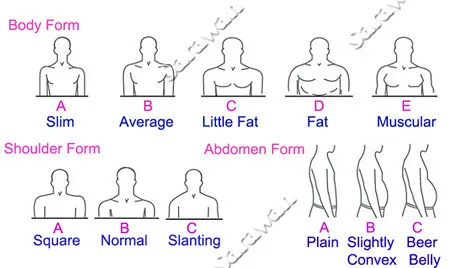
(18-20) Shape of body/shoulder/abdomen
Step (1.2.3): Sending measurement information with pictures for referrence
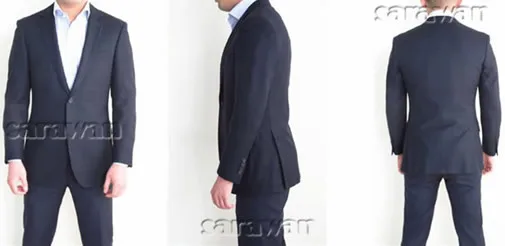
If possible, please provide also 3 body pictures (front, back and side view), this is perfect for our tailor to know your body form and make perfect well-fitting suit for you.
You can send us body picture without showing your head as shown in the reference below.

Step 2: Confirmation and production
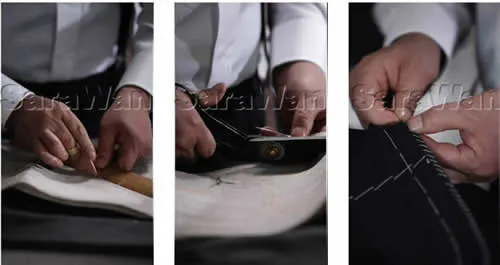
We’ll confirm your submitted information, please keep in touch after your order submission.
Production of our custom made suits starts with measurements analysis, suits design and fine adjustment, then hand cut to sewing details, 90% of the process are hand made; each detail reflects the commitment of our senior tailors with more than 20 years’ experiences and senior designers with more than 15 years’ experiences.
Each custom made suit usually takes 7-15 days of our dedication (In sepcial holidays, such as Chinese New Year or National holidays, there will be some little delaying):
-280 steps for jacket
-126 steps for pants
-98 steps for fabric cut
-36 steps for ironing
-50 steps for quality check






Follow us on: